Designing personalized graphics can be time-consuming, especially if you need to create multiple versions of the same template for different people or occasions.
With the new Canva connector in ChatGPT, you can automate much of that work.
Instead of manually editing every design, you can prompt ChatGPT to log in to Canva, duplicate your template, and generate custom text variations for each version.
In this tutorial, I’ll show you how to link ChatGPT with Canva, use Agent Mode to create multiple personalized designs at once, and then polish them inside Canva before downloading.
You’ll know how to speed up repetitive design tasks while still keeping control of the final look.
We’ll be using the Canva AI connector inside ChatGPT, available here: https://www.canva.com/ai.
Step 1: Prepare your Canva template properly
Start by opening Canva AI in your browser. Decide on the kind of design you want to automate.
It could be:
A congratulatory card
A business flyer
A social media post
A personal letter
Here’s how to do it:
Log in to your Canva account.
Either click Create a Design to start from scratch or pick an existing template from your saved projects.
Give the template a clear name, for example, “Congratulations Letter Template.” This name matters because you’ll later reference it inside ChatGPT.
Finalize the layout, fonts, and colors. Do not worry too much about the text because ChatGPT will overwrite that part when creating versions.
Tip: Keep your design simple and consistent. The fewer design elements you use, the easier it is for ChatGPT and Canva to apply text changes correctly.
Step 2: Connect Canva with ChatGPT in Agent Mode
To let ChatGPT work inside Canva, you need to enable the Canva connector.
Here’s the full setup:
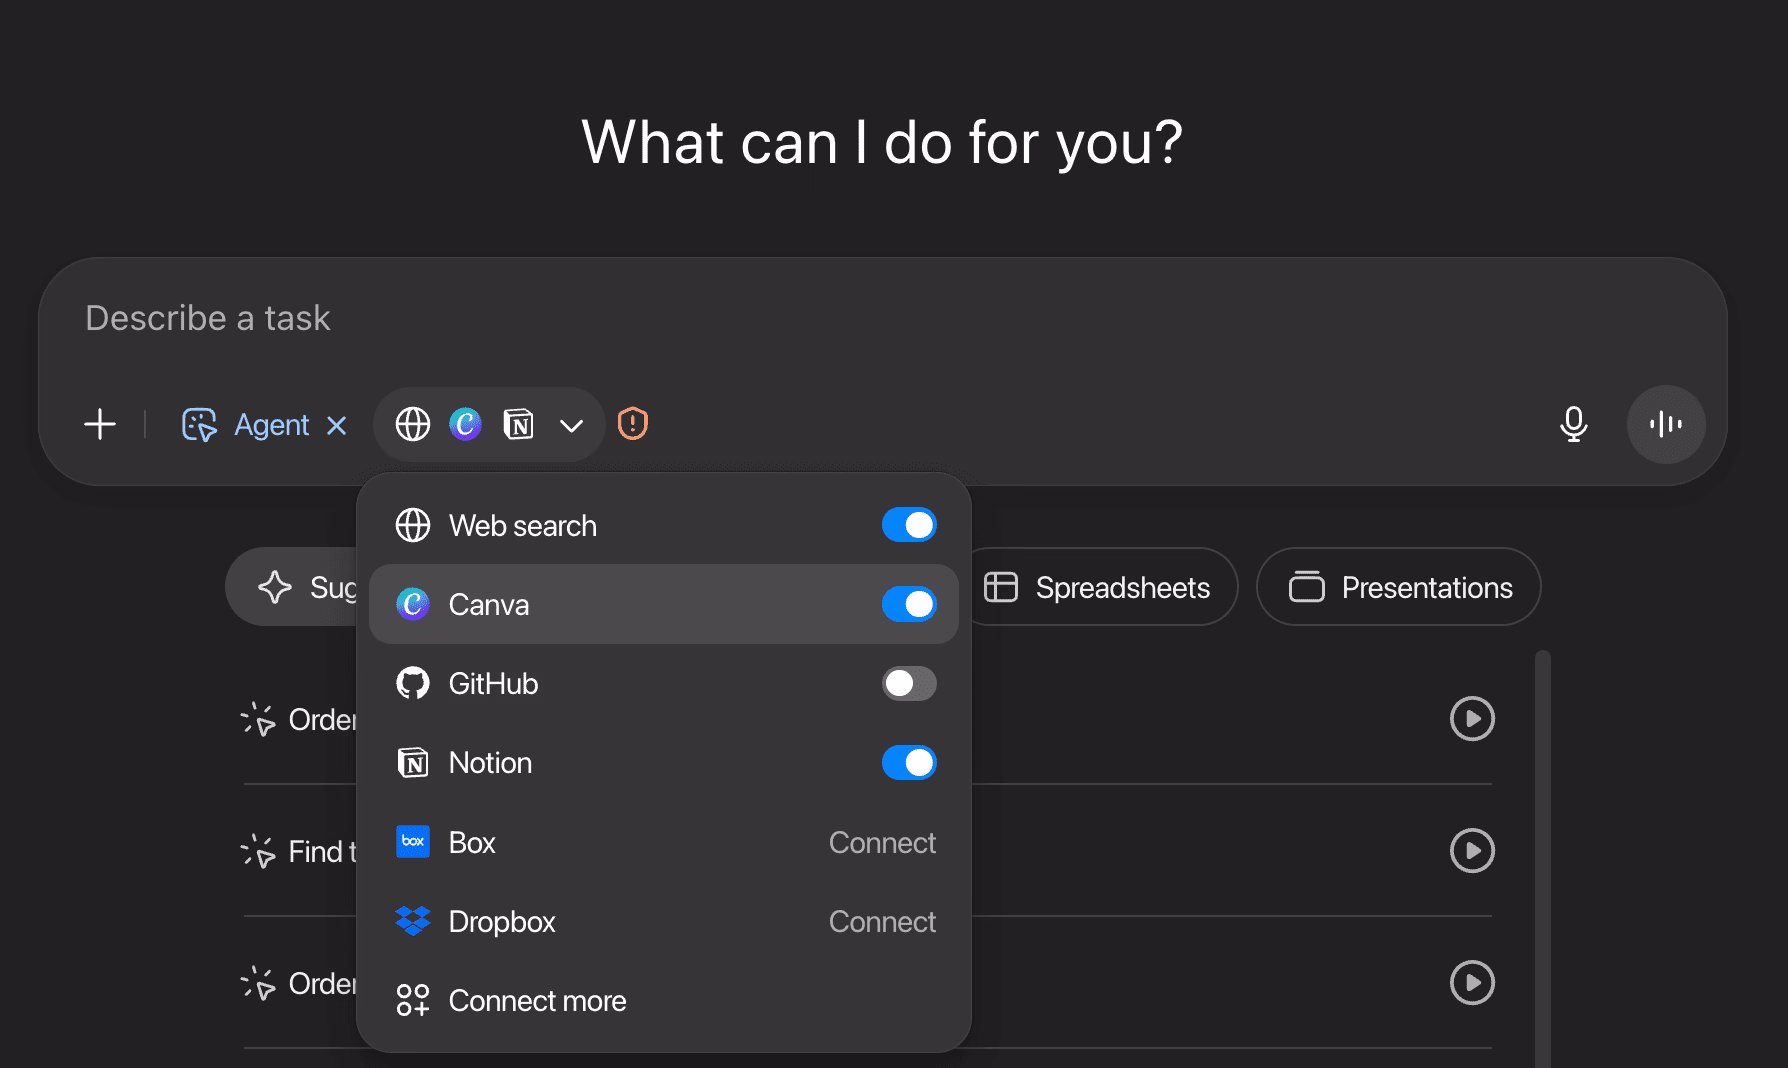
Inside ChatGPT, click the “+” icon next to Agent Mode.
Find the Canva option in the list of available connectors.
Click Connect and log in to your Canva account when prompted.
Approve the permissions so ChatGPT can access your templates.
After this step, ChatGPT gains the ability to:
Locate your existing Canva templates.
Duplicate them as many times as you want.
Auto-fill each duplicate with unique text variations you provide.
Without this connection, ChatGPT won’t be able to interact with Canva.
Make sure the connection is active before moving forward.
Step 3: Write your prompt for multiple versions
Once Canva is connected, it’s time to give ChatGPT clear instructions. This is where you tell it which template to use and what kind of variations you need.
For example, type something like this inside ChatGPT:
“Find my ‘Congratulations Letter Template’ in Canva and create 4 versions with custom messages for: Michael (bodybuilding win), Anna (new baby), Peter (job promotion), Sarah (graduation).”
What happens:
ChatGPT looks for your saved template in Canva.
It duplicates it four times.
Each copy gets filled with the personalized text you provided for each recipient.
Tips for better prompts:
Always include the exact template name you saved in Canva.
Write short but specific descriptions of what each variation should say.
If you want different tones (formal, funny, casual), add that to the prompt as well.
This step is where you save the most time. Instead of creating each design manually, you let ChatGPT generate multiple drafts in one go.
Step 4: Review and polish inside Canva
Automation gets you 80% of the way, but you’ll still need to make quick edits.
Open Canva and check each version that ChatGPT generated.
Here’s what to look for:
Text placement – Sometimes longer messages don’t fit perfectly in the layout. Adjust font size or spacing.
Colors and alignment – Make sure the design looks balanced after the new text is added.
Consistency – If you created multiple cards or flyers, check that they still share the same style.
Once you’ve cleaned up the details:
Click Download in Canva.
Choose your preferred format (PDF, PNG, JPG).
Save all your variations.
Tip: If you need to send these designs fast, keep Canva’s “Share” link handy so recipients can view them online without you having to attach files.
Pro tips for smoother design automation
Draft text first in ChatGPT
Before asking ChatGPT to create Canva versions, generate all your text variations directly in ChatGPT. This helps you refine tone, spelling, and flow without having to jump back and forth between Canva and ChatGPT.Keep layouts flexible
Templates with rigid text boxes often break when text length changes. Use Canva designs with adjustable or simple text areas so ChatGPT’s auto-filled content fits better.Use Canva AI for layouts
ChatGPT is best at generating and inserting text. Canva’s AI tools are stronger when it comes to adjusting layouts, images, and colors. Let each tool do what it does best.Expect some cleanup
Agent Mode isn’t a one-click magic button. Treat it like a drafting assistant. You’ll still need to make final adjustments, especially if you’re sending designs to clients or using them in marketing.Name your files clearly
When downloading, add the recipient’s name or purpose in the file name, like “Congrats_Michael.pdf.” This avoids confusion when managing multiple versions.Think batch work
Instead of creating just two or three versions, plan ahead. Have ChatGPT generate five or ten variations in one session. The more repetitive the task, the more time you save with automation.