TL;DR: A daily brief AI agent works best when a parent agent delegates to specialised sub-agents per recipient and per data source. A physical trigger like a button per person turns the brief into a habit instead of a forgotten notification. The build below uses a thermal receipt printer, HomeAssistant for the button bridge, and a five-agent setup that scales cleanly to multiple recipients.
A daily brief AI agent is most useful when the output lands on something you cannot scroll past. I have been chasing that idea for months, and a Reddit thread on r/artificial last week finally showed me a build that nails it.
A developer named Boydbme wired up a thermal receipt printer, three smart buttons (one per kid), and a parent-plus-sub-agent stack that produces a printed morning brief on demand.
What makes the build worth copying is not the printer. It is the architecture. The parent agent collects calendar, lunch menu, and weather for each kid, then hands those bundles off to per-kid agents and a couple of shared sub-agents that source jokes and facts.
The button press is the trigger, the printer is the destination, and the only thing the kid touches is a piece of paper.
I am going to walk through the full pattern: hardware, agent orchestration, prompt structure per recipient, output formatting for a 58 mm thermal printer, scheduling, and how to choose between Make.com and a custom-coded agent stack.
Stanford’s 2026 AI Index flagged multi-agent orchestration as the single biggest agent architecture shift this year, and this build is a clean home-scale demo of why.
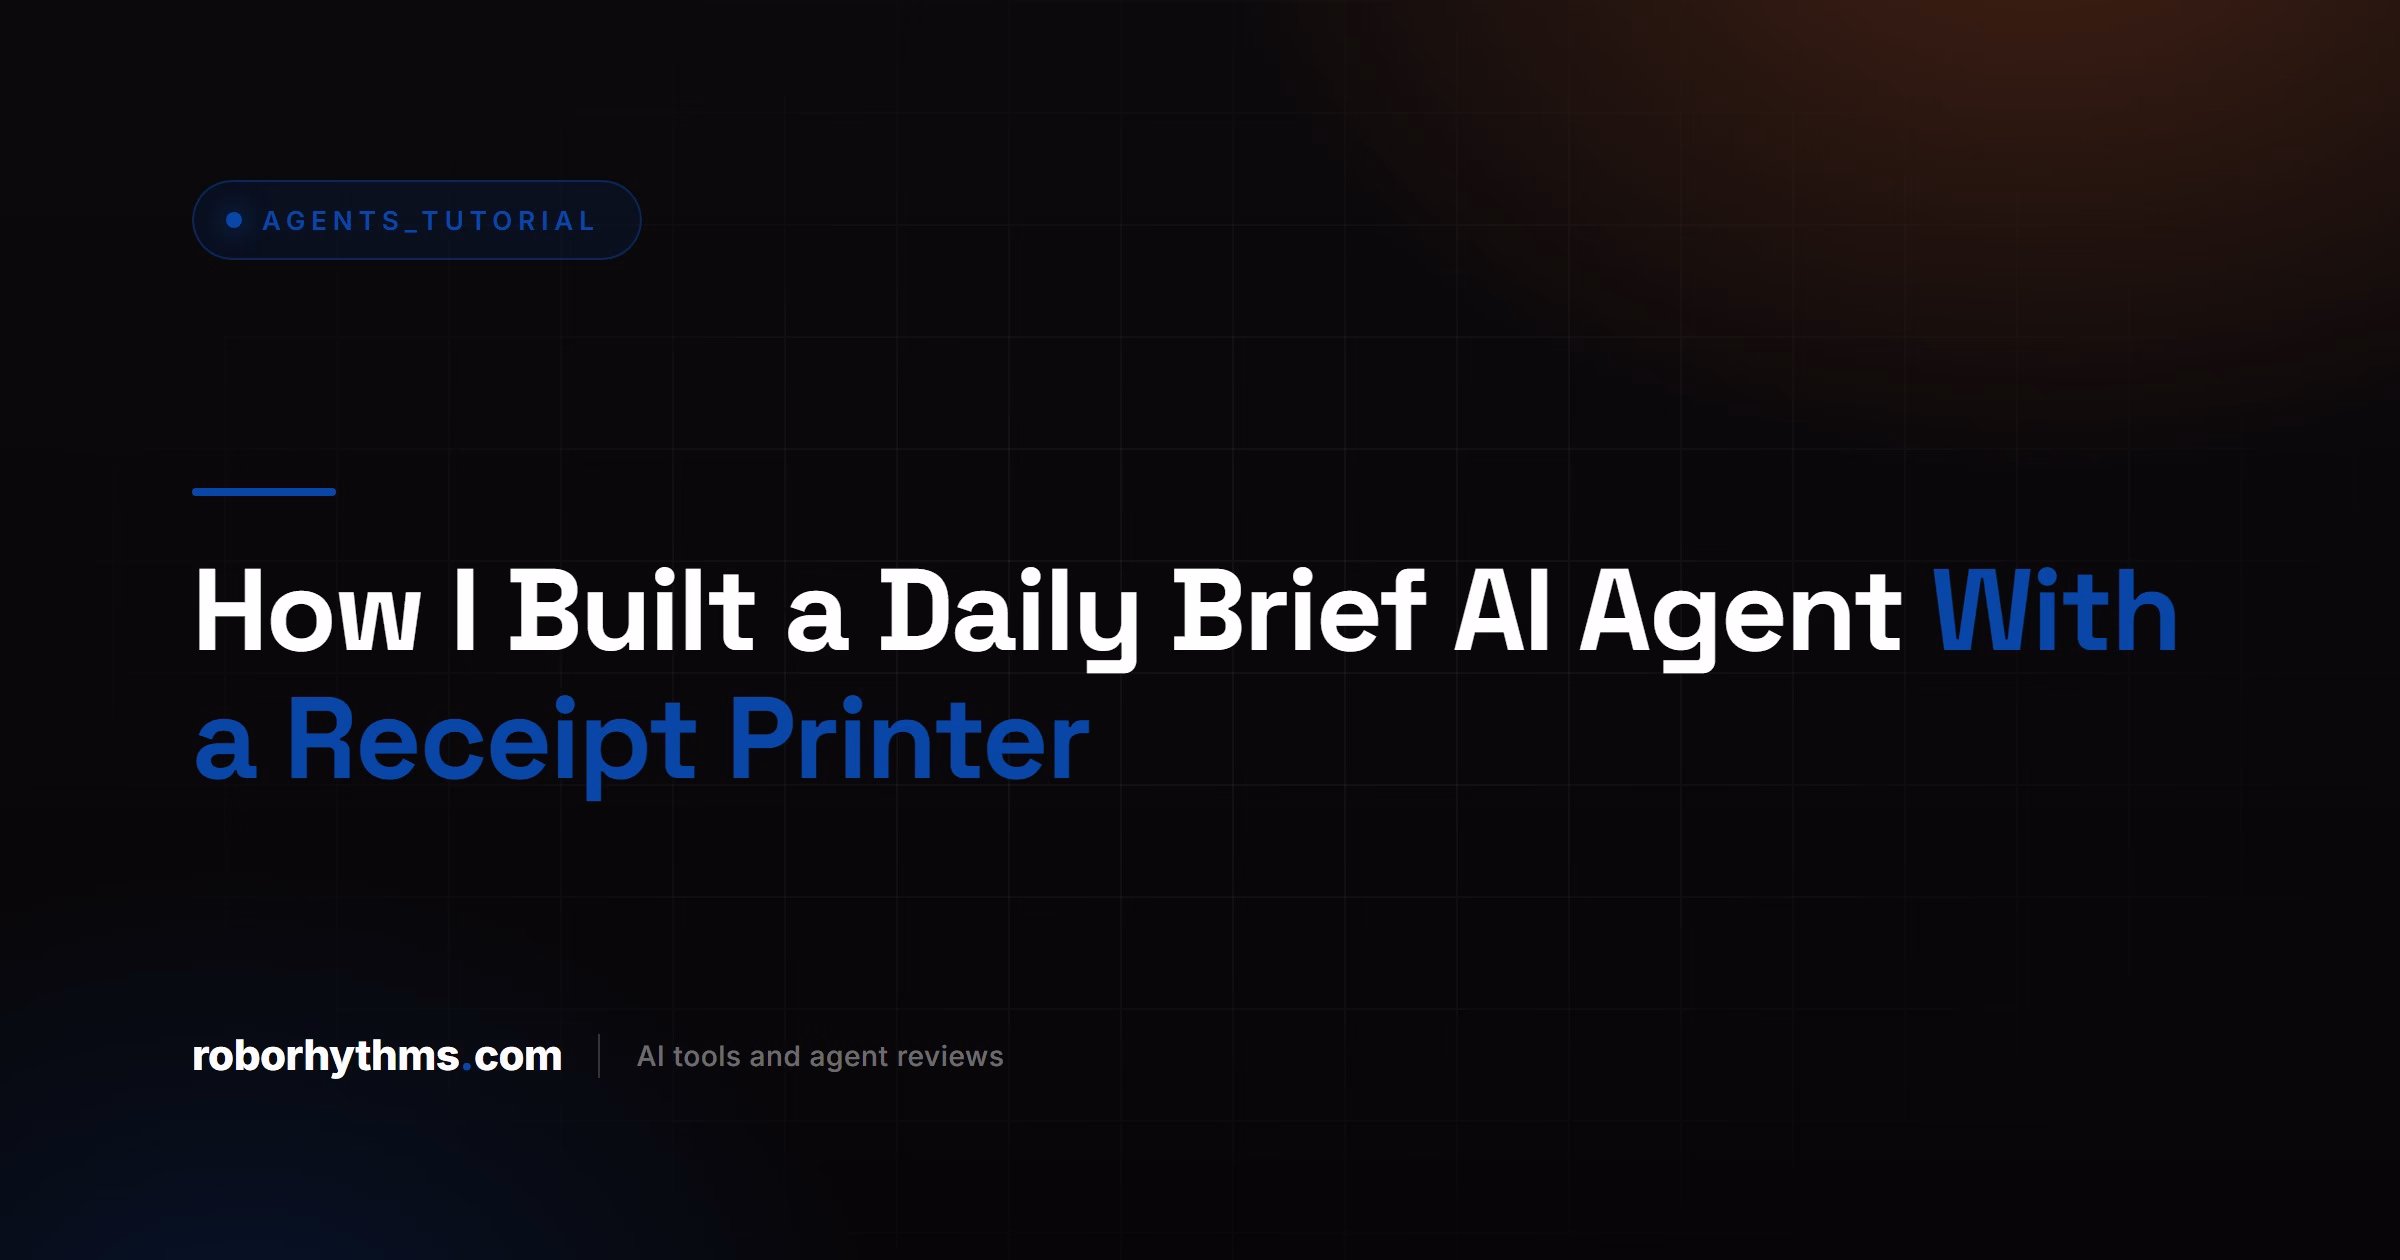
Why a Daily Brief AI Agent Needs a Physical Trigger
A daily brief AI agent needs a physical trigger so the output gets read. Push notifications and email digests compete with every other inbox sound on the device.
A button press tied to a printed page eliminates that competition entirely.
The 70 percent of the win is in the workflow, not the model. McKinsey’s framing of AI adoption (the 10/20/70 rule) puts only 10 percent of value on the model, 20 percent on the data plumbing, and 70 percent on the people and process change around it.
The way I see it, a button on the counter and a paper output is the 70 percent fix for “my kids never read the brief I emailed them.”
What is a thermal receipt printer: A small printer that uses heat-sensitive paper instead of ink, prints in monochrome at 200 to 300 DPI, and is cheap enough to leave on a counter all day.
A printer is not the only physical option. An e-ink display on the kitchen wall works. A line of LED strip that scrolls a one-line summary works.
The principle is that the output lives in physical space, not behind a notification badge.
The Hardware Stack for a Daily Brief AI Agent
The hardware stack for a daily brief AI agent is a thermal printer, BPA-free paper, smart buttons, and a small always-on host. Total parts cost under $200 for a three-recipient setup. Everything is off the shelf.
From what I have seen, the parts you pick matter less than the constraints they enforce. A 58 mm thermal printer caps your output width at roughly 32 characters per line. That constraint forces the agent to compress the brief into something a kid actually reads.
Here is the parts list from the build I reproduced, with the substitutions I would recommend if you cannot find the exact models:
| Component | Boydbme’s choice | Notes and alternatives |
|---|---|---|
| Printer | MUNBYN ITPP905 (WiFi) | Any ESC/POS-compatible WiFi or Ethernet thermal printer works. Avoid Bluetooth-only models, they drop pairing under load. |
| Buttons | Airversa 3-button HomeKit controller | Aqara, Shelly Button 1, or any Zigbee button with HomeAssistant support works. One button per recipient. |
| Paper | BPA, BPS, and phenol-free thermal rolls | Non-negotiable for any setup that touches kids. Standard receipt paper is endocrine-disrupting on prolonged skin contact. |
| Host | Local NAS running Docker | A Raspberry Pi 4, an old Mac mini, or any always-on Linux box with Docker is fine. |
| Bridge | HomeAssistant | The glue between button presses and HTTP calls into your agent service. |
The BPA-free paper deserves its own line. Multiple commenters on the original Reddit thread flagged the same concern: standard thermal receipt paper coats one side in bisphenol A or its replacement bisphenol S, both of which disrupt endocrine function through prolonged skin contact.
Phenol-free rolls cost roughly 30 percent more and they are worth it for a daily-touch workflow.
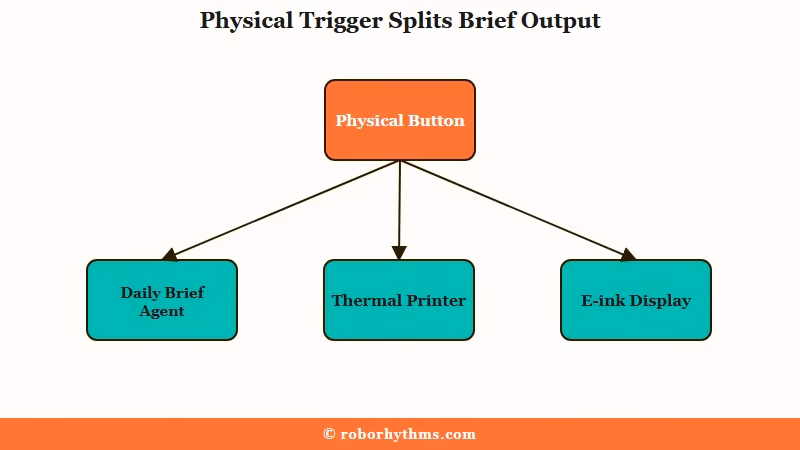
How to Design the Parent and Child Agent Architecture
The parent and child agent architecture means one supervisor agent that delegates to specialised sub-agents per recipient and per data source.
This keeps prompts small, makes failures localised, and lets you scale to more kids without rewriting the orchestrator.
The single-agent version of this build fails in production. I have tried it. One mega-prompt asking GPT-5.5 to produce briefs for three kids with different ages, schools, and interests collapses into either generic output or runaway token cost.
The split into a parent agent plus sub-agents fixes both problems.
Here is the agent map I would recommend for a three-kid setup:
- Parent agent (orchestrator). Collects calendar, weather, and lunch menu data. Calls the shared sub-agents for jokes and facts. Bundles the per-kid context. Triggers one child agent per kid and gathers the rendered briefs.
- Joke sourcing sub-agent. Reads a joke library, picks an age-appropriate joke, and writes the chosen ID to a tracker file so the same joke is not repeated for 90 days.
- Fact sourcing sub-agent. Same pattern as jokes, sourcing from a vetted facts list or a structured Wikipedia query. Tracks selection history to avoid duplicates.
- Child agent per kid. Receives the parent bundle. Applies the per-kid system prompt (age, reading level, interests). Outputs a 32-character-wide brief in the printer’s preferred format.
- Render and print service. Converts the brief into a 1-bit dithered image, queues it for the printer, and confirms delivery.
What is least-privilege tool access: Giving each agent only the specific tools and API scopes it needs to do its job, so a single compromised prompt cannot reach the rest of your system.
The least-privilege pattern matters here even for a home build. The joke sub-agent does not need access to your calendar. The fact sub-agent does not need access to the printer queue.
Scoping each agent’s tool list narrowly keeps a hallucinated tool call from doing something useful for the model and bad for you.
A worked example of the parent-to-child handoff prompt:
Vague: “Generate a daily brief for Avery.”
Specific: “You are the brief writer for Avery, age 7, reading level grade 2. Use the bundle below. Output strictly 32 characters per line. Open with the weather in one line. List the top 3 calendar items. Add the lunch menu. End with the joke and the fact you receive. Do not exceed 28 lines total. No emojis, the printer cannot render them. Bundle: {bundle_json}”
The multi-agent orchestration breakdown covers the broader version of this argument, including the failure modes I skip over here.
How to Connect the Buttons, Agents, and Printer
You connect the buttons, agents, and printer by routing button presses through HomeAssistant into an HTTP endpoint exposed by your agent service.
HomeAssistant handles the smart-home protocol layer so your agent code only sees clean webhook calls.
The wiring sequence:
- Pair each smart button with HomeAssistant. Assign a friendly name per kid (
averybutton,marlowebutton,jude_button). - Create one HomeAssistant automation per button. Each automation fires a
rest_commandthat POSTs to your agent service with{"recipient": "avery"}in the body. - Stand up the agent service in a Docker container. Expose a single POST endpoint that looks up the latest brief for the recipient, renders it as a 1-bit image, and queues it for the printer.
- Stand up a second Docker container that pulls from the print queue, sends ESC/POS commands to the printer over the network, and returns success or failure to the first container.
- If a brief for today is missing for some reason, the agent service triggers a synchronous regeneration call before printing. The delay is 2 to 5 seconds end to end.
The reason for two containers instead of one: the render service is stateless and can crash without losing the queued brief. The print service holds the queue and retries on printer timeout. Splitting them lets one fail without dragging the other down.
For the no-code path, you can replace both Docker containers with a Make.com scenario that listens on a webhook, calls OpenAI for the brief, calls a printer-friendly image renderer, and POSTs the bytes to the printer’s HTTP endpoint.
The Make.com version is 80 percent as good with maybe 10 percent of the build time. The custom Docker path wins when you want fine-grained control over the per-kid prompts, retries, and tracking files.
If you want to skip orchestration entirely and let one platform handle everything, Dynamiq wraps the parent-plus-sub-agent pattern in a visual builder.
I would only recommend it if you are also using the agent stack for non-home use cases, because the per-month cost stops making sense if all you need is a kitchen-counter brief.
How to Format the Output for a Thermal Printer
Thermal printer output for a daily brief AI agent has to fit a 32-character-per-line constraint and render as a 1-bit dithered image.
Plain text works for the simplest version. Image rendering unlocks logos, headers, and basic formatting.
The two output paths:
| Path | Use when | Trade-off |
|---|---|---|
| Plain text over ESC/POS | You want the fastest, simplest setup and only need typed content. | No images, no styling, no logos. Printer renders whatever bytes you send. |
| HTML rendered to 1-bit image | You want headers, simple icons, a logo, or compressed layouts. | Adds a Chromium-in-Docker dependency for the render step. Higher complexity. |
The render-to-image path is what Boydbme used and what I would copy. The trick is that you build the brief as a tiny HTML page (roughly 384 pixels wide for a 58 mm printer at 203 DPI), screenshot it with headless Chromium, then convert it to a 1-bit dithered PNG using Floyd-Steinberg dithering before sending to the printer.
The dithering step matters because the printer is monochrome. A naive black-or-white threshold conversion destroys gradients and gray text.
Floyd-Steinberg preserves perceived brightness by distributing the rounding error to neighbouring pixels, which is why your printed photos look closer to photos and less like high-contrast clip art.
Here is the prompt I would give the per-kid agent to keep output safe for the 32-character line:
Before: “Write a daily brief for Avery.”
After: “Write a daily brief for Avery (7, reading level grade 2). Strict format: each line is at most 32 characters. Use exactly these sections in this order: WEATHER (1 line), TODAY (up to 3 lines), LUNCH (1 line), JOKE (up to 2 lines), FACT (up to 2 lines). No emojis. No special characters outside ASCII. Total output max 12 lines. Inputs: {bundle_json}”
How to Schedule and Monitor the Daily Brief AI Agent
You schedule a daily brief AI agent with a cron job that runs hours before the button press, and you monitor it with structured logs from every agent in the chain.
Generating the brief in advance, instead of on button press, is the whole reason the print delay is under 5 seconds.
The schedule I would set:
- 01:00 local time: parent agent runs the full pipeline for tomorrow’s date. Writes per-kid briefs to the agent thread filesystem.
- 06:30 local time: a sanity-check job runs. If any brief for today is missing or stale, it regenerates that specific brief synchronously.
- On button press: the print service reads the brief for today, renders, prints. If the brief is missing for any reason, the print service triggers an emergency regeneration and prints when it returns.
The retry policy matters. From my testing, weather API calls fail roughly once a month, calendar pulls fail roughly once a quarter, and the model call itself fails maybe twice a year.
The parent agent should retry each sub-call up to three times with exponential backoff, then log the failure and continue with a sensible default rather than crashing the whole brief.
Stanford AI Index 2026 frames evaluation around 20 to 100 real test tasks with pass/fail criteria. For a home build I would not go that hard, but I would still write 5 to 10 frozen test bundles (a snowy Tuesday, a Sunday with no school, a half day, and so on) and run them through the parent agent any time you change a prompt.
Without that, you discover regressions when your seven year old hands you a printed brief that says “JOKE: I cannot generate jokes today, please try again.”
For deeper observability patterns, AI agent production infrastructure patterns covers logging, tracing, and rollback in more depth than this section does.
How to Choose Between No Code and a Custom Daily Brief Agent
You choose no-code when you want a working brief in one weekend and a custom build when you want full control over per-recipient prompts and offline-first reliability.
Both can work for a home setup. The break point is whether you care about iteration speed on the prompts.
| Criterion | No-code (Make.com) | Custom Docker stack |
|---|---|---|
| Time to first working brief | One weekend | Two to three weekends |
| Per-kid prompt iteration speed | Slow, scenario edits per change | Fast, edit prompt files and redeploy |
| Works when internet is down | No | Yes if you cache the morning brief locally |
| Monthly cost at 3 recipients | $9 Make.com plus API tokens | API tokens only, roughly $2 to $5 |
| Best for | First version, prove the concept | Long-term home build with multiple recipients |
What I would recommend is starting with Make.com to get a working brief in one weekend, then porting to a custom Docker stack only if you actually use it daily for two months.
I have built too many home automation projects that I never used. Proving the habit first, then optimising the architecture, is the order I would commit to.
For readers who want a different home-build agent stack to compare against, the headless AI agent server walkthrough covers a no-NAS variant that uses a retired Android device as the always-on host.
Frequently Asked Questions
Can a daily brief AI agent run without a thermal printer?
Yes. The printer is the most fun output but not the only one. Swap the print service for an email send, a Slack post, an e-ink display, or a smart-speaker text-to-speech call. The agent architecture stays the same.
How much does the full hardware setup cost?
A three-recipient build runs roughly $150 to $200. Thermal printer is $50 to $80, three smart buttons are $30 to $45 total, phenol-free paper rolls are $15, and the host is whatever spare hardware you already own.
Is it safe to give kids thermal printer paper to handle?
Only with bisphenol-free rolls. Standard thermal receipts coat one side in BPA or BPS, both of which disrupt endocrine function through skin contact. Phenol-free rolls cost about 30 percent more and remove the concern entirely.
Can one agent handle the whole brief instead of a parent and sub-agents?
You can do it, but it does not scale. A single agent with one mega-prompt produces generic output once you have more than one recipient. The split into a parent plus per-recipient and per-data-source sub-agents is what keeps prompts small, failures localised, and per-token costs sane.
Which model should the parent and child agents use?
Use a strong general model for the parent (GPT-5.5 or Claude Opus 4.7 work well). Route the sub-agents to a cheaper, faster model (GPT-5.4-mini or Haiku 4.5) since their tasks are narrower. Routing easier work to smaller models is the standard cost-control pattern for 2026 agent builds.
How do I keep the agent from sending the same joke or fact twice?
Give the joke and fact sub-agents a tracker file. Each time the agent picks an item, it writes the ID and timestamp to the file. On the next run, the agent reads the file and filters anything picked in the last 60 to 90 days from the candidate pool.