Quick takeaways
• Start with a clear, well-lit selfie for best results
• Use detailed prompts in Gemini to control lighting, pose, and background
• Test different styles until the image matches your professional brand
• Update LinkedIn, résumés, websites, and event profiles with your new headshot
A strong profile picture sets the tone for how others see you online.
A polished headshot helps with first impressions on LinkedIn, résumés, and even speaking opportunities. The good news is you don’t need an expensive photo shoot.
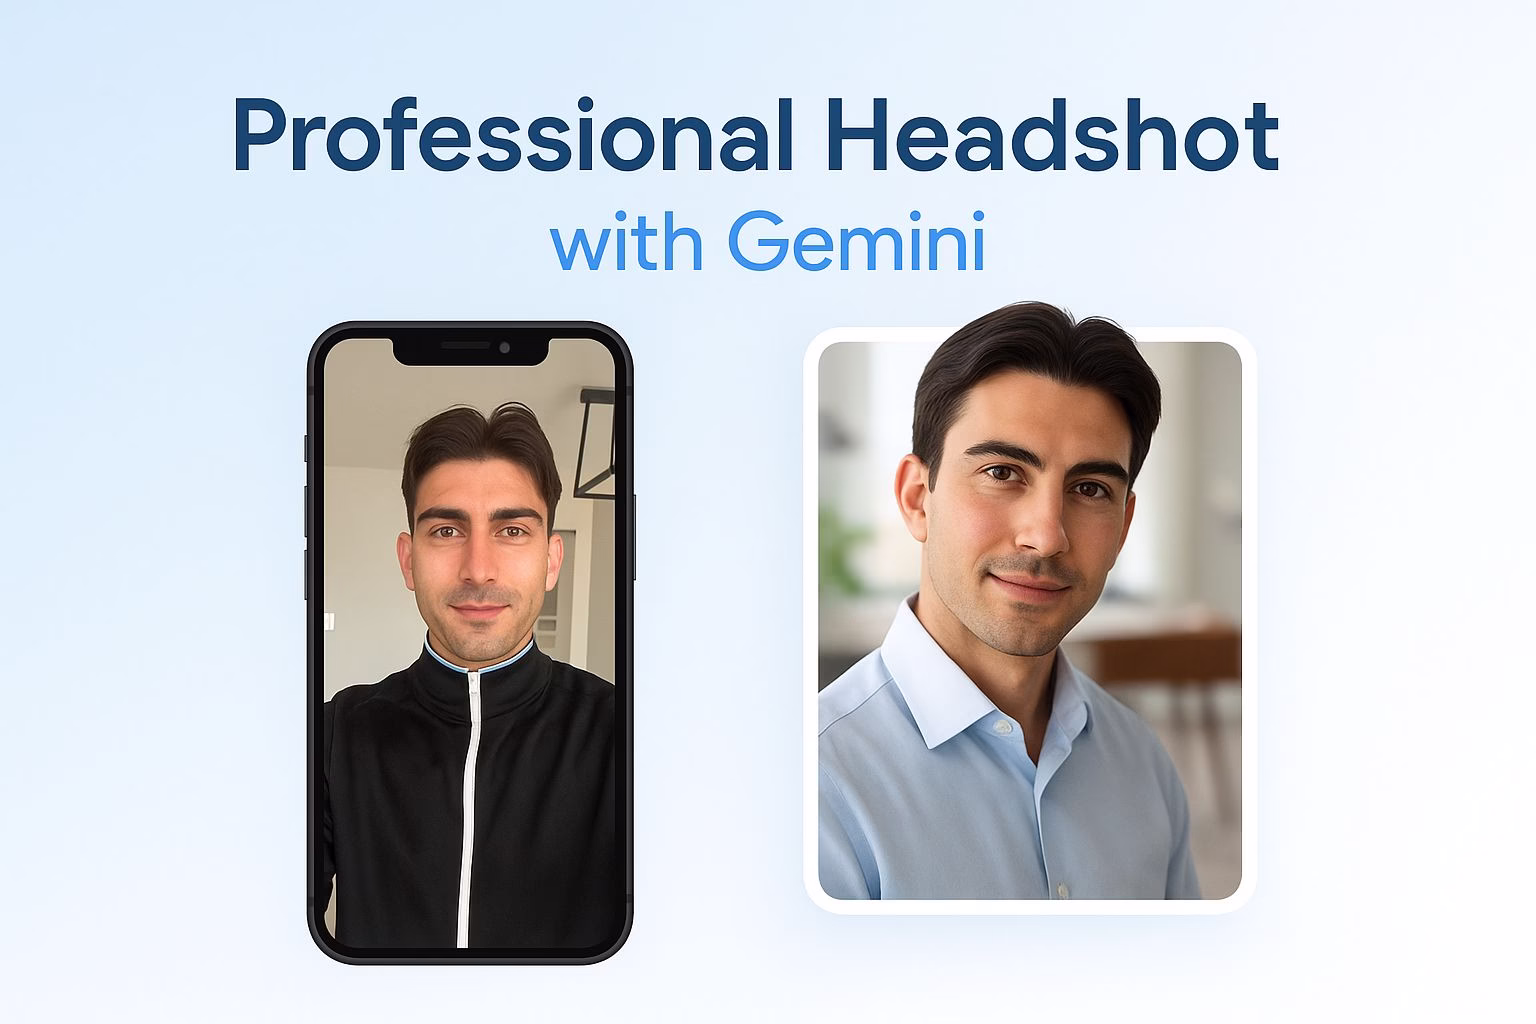
With Gemini 2.5 Flash, you can turn a simple selfie into a professional-looking photo in minutes.
This method works well if you don’t have access to a studio or a photographer. You upload a casual photo, adjust a few details in the prompt, and the tool generates a clean, modern headshot.
The results can look like they were taken in a bright office setting, a studio, or even outdoors, depending on the style you want.
I’ve tested this workflow and found that the background and lighting details matter the most. By describing the look you want clearly, Gemini produces images that feel natural instead of artificial.
This tutorial will walk through the exact steps so you can create a headshot you’ll feel confident using across all your professional platforms.
How to create a professional headshot with Gemini

The process is straightforward and doesn’t require any advanced editing skills. Gemini 2.5 Flash has built-in image creation tools that handle most of the work.
What matters is how you set up your prompt and the type of photo you start with.
Follow these steps to get your headshot ready:
Go to gemini.google.com and enable Create Images at the top of the prompt box.
Upload a clear selfie where your face is well-lit.
Paste this prompt:
“Transform my selfie into a fresh but professional image suitable for a social media profile. The lighting should be natural, flattering, and multi-dimensional. My head is slightly tilted so it doesn’t look stiff, and it should look like I’m in a modern, bright office with a blurred background.”Review the result. If it feels too artificial or off-brand, adjust the wording.
Download the finished image and save it for LinkedIn, résumés, websites, or speaking engagements.
The first version is usually good enough, but making small edits to the prompt can make your headshot stand out more.
How to tweak prompts for better results
Gemini responds strongly to the details in your prompt.
A few extra words can completely change the tone of the image. Instead of settling for the first output, test variations until you find one that matches your professional style.
Here are adjustments you can try:
Change the background. Try phrases like “neutral studio,” “warm café,” or “outdoor blurred park” to see how they affect the tone.
Adjust the lighting. Adding “soft daylight” or “bright indoor lighting” can remove shadows and make the photo more flattering.
Refine the pose. If your selfie looks too rigid, ask for a “slight head tilt” or “natural smile.”
Test color tones. You can request “warm color tones” or “cool professional tones” depending on your personal brand.
This flexibility is useful if you’re building a consistent image across platforms.
For example, a more formal look may suit LinkedIn, while a casual office background might feel right for a personal website.
Choosing the right selfie for best results
The quality of your starting selfie makes a big difference in how professional the final headshot looks.
Gemini can enhance your photo, but it works best when the base image is clear and balanced.
When selecting a selfie, aim for these basics:
Good lighting: Natural light from a window usually works best. Avoid dark rooms or harsh overhead lights.
Neutral clothing: A solid shirt or blouse looks more professional than busy patterns.
Centered framing: Your face should be the focus of the photo, not cut off or too far away.
Relaxed expression: A slight smile often feels more approachable than a blank or tense look.
If your photo is blurry or heavily shadowed, Gemini may struggle to produce a polished headshot.
A simple, well-lit selfie will always deliver stronger results.
Backgrounds that align with your personal brand
The background you choose can subtly shape how others perceive you. Since Gemini allows you to describe the setting, you have the flexibility to match your brand or industry.
Some examples include:
Modern office: Works well for corporate professionals and consultants.
Neutral studio: A safe choice for most careers, putting all the focus on you.
Warm café: Creates a friendly, approachable look, useful for creatives and freelancers.
Outdoor blurred park: Suggests balance and energy, often fitting for wellness or lifestyle professionals.
Think about where your audience expects to see you. A lawyer might lean toward a neutral studio, while a designer could stand out with a modern office or café background.
Aligning the image with your professional environment strengthens your personal brand.
Where to use your finished headshot
Once you’ve created a polished headshot, the next step is putting it to use.
A professional image makes a strong impression across platforms where your presence matters most.
Here are the top places to update:
LinkedIn: Recruiters and colleagues often judge profiles by the photo first.
Résumés and CVs: Adding a headshot in regions where it’s standard practice can give your application a more personal touch.
Company website: If you’re part of a team page, a consistent and clean headshot boosts credibility.
Speaking or event profiles: Conferences and panels often require a photo for promotional materials.
Personal website or portfolio: Your headshot sets the tone for visitors exploring your work.
Updating across these platforms helps keep your personal brand consistent.
It also signals professionalism to anyone who researches you online.